As a manufacturer and supplier of Lightweight Tiles, which are brilliant for a Conservatory Roof Conversion, we get asked this question a lot: “How to do a conservatory roof conversion successfully??”
So, to answer this question, we spoke to one of our preferred installers, Champion Home Improvements if they could explain the “over roofing” process used in the below video.
Conservatory Conversion using the Over Roofing Method
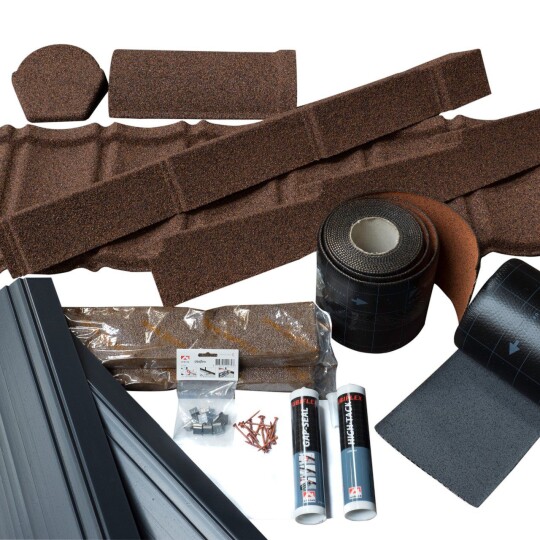
What’s interesting about this roof replacement is that the original aluminium roofing frame is incorporated into the construction of the new roof. Please Note: the aluminium roofing frame was checked, to make sure that it could accommodate the roofing upgrade. To know more about the dimensions and weights of our brown range of granulated roof tiles, just click here.
Running order of the job:
- Outside the conservatory:
- Removed of all the polycarbonate windows from the roof.
- Inside the conservatory:
- Fitted rows of 25mm roofing batten horizontally to the existing aluminium roof struts.
- Outside the conservatory:
- Insert 70mm Insulation Board into the space which housed the old polycarbonate windows
- Then cover the aluminium struts and insulation board with a breathable roofing membrane (We can also supply the membrane).
- Fix Roofing Battens to the struts, this secures the membrane to the roof. We recommend the use of eaves guards, these need to be slotted under the 1st batten. They direct the rainwater directly into the guttering. (We also recommend the inserting of foam fillers as a draught prevention.)
- Make sure the battens are set to the correct distance. Download our “Fitting Guidance PDF".
- Fit lightweight tiles to the battens with our plastic-coated screws. Again, referencing the Fitting Guidance PDF.
- Fit matching ridge tiles and end caps. (Fill all gaps with “Flexim Roof Putty”).
- Lead work is reinstated.
- Inside the conservatory:
- Electrics were updated.
- 25mm Insulation board is screwed onto the internal roofing battens – Note the roofing batten creates an air gap which reduces the chances of condensation build-up.
- Plaster board is screwed to the ceiling – the screws anchor into the internal fixed battens.
- The plasterboard is plastered and painted.
Benefits of Lightweight Plastic Tiles
The end-result is a conservatory which can be used all year round. But there are other hidden benefits from using our Tiles:
- They are made from recycled plastic, so you're doing your bit for the environment
- Ultra lightweight
- They come with a 25-year guarantee, due to their durability!
- Range of 9 Product Colours to choose from
- Online Tile calculator to help workout the cost of your project
- Can be used by DIYer’s and professional builders like Champion Home Improvements
- This roofing system is award winning product
- Able to be installed from an inclination of 10 degrees